Legal
Categories
Recommended Products
-
CoCounsel
Move faster and accomplish more with a professional-grade, generative AI assistant that transforms the way you work. Thomson Reuters CoCounsel is with you every step of the way, backed by authoritative content and industry-leading expertise.
-
Westlaw
Conduct legal research efficiently and confidently using trusted content, proprietary editorial enhancements, and advanced technology.
-
Practical Law
Accelerate how you find answers with powerful generative AI capabilities and the expertise of 650+ attorney editors. With Practical Law, access thousands of expertly maintained how-to guides, templates, checklists, and more across all major practice areas.
Tax & Accounting
Categories
Top products for corporations
Top products for accounting firms
Recommended products
-
CoCounsel Tax, Audit, Accounting
Move faster and accomplish more with a professional-grade, generative AI assistant that transforms the way you work. Thomson Reuters CoCounsel is with you every step of the way, backed by authoritative content and industry-leading expertise.
-
ONESOURCE
ONESOURCE tax software solutions work together across corporate tax and trade lifecycles.
-
1040SCAN
Automate work paper preparation and eliminate data entry
Trade & Supply
Recommended products
-
Foreign Trade Zone Management
Software that keeps supply chain data in one central location. Optimize operations, connect with external partners, create reports and keep inventory accurate.
-
Indirect Tax
Automate sales and use tax, GST, and VAT compliance. Consolidate multiple country-specific spreadsheets into a single, customizable solution and improve tax filing and return accuracy.
Risk & Fraud
Recommended products
-
CLEAR
Search volumes of data with intuitive navigation and simple filtering parameters. Prevent, detect, and investigate crime.
-
Fraud Detect
Identify patterns of potentially fraudulent behavior with actionable analytics and protect resources and program integrity.
-
ID Risk Analytics
Analyze data to detect, prevent, and mitigate fraud. Focus investigation resources on the highest risks and protect programs by reducing improper payments.
News & Media
Who we serve
- Broadcasters
- Publishers
- Governments
- Marketers & Advertisers
- Professionals
- Sports Media
- Corporate Communications
- Health & Pharma
- Machine Learning & AI
Content Types
Topics
- Sports
- Science
- Technology
- Human Interest
- Business & Finance
- Politics
- Entertainment & Lifestyle
- Health
- All Topics
- Reuters Community
Services
Platforms
Media Solutions
About
Recommended products
-
Reuters Connect
Around the globe, with unmatched speed and scale, Reuters Connect gives you the power to serve your audiences in a whole new way.
-
Reuters Plus - Content Studio
Reuters Plus, the commercial content studio at the heart of Reuters, builds campaign content that helps you to connect with your audiences in meaningful and hyper-targeted ways.
-
Reuters.com Platform
Reuters.com provides readers with a rich, immersive multimedia experience when accessing the latest fast-moving global news and in-depth reporting.
Books
Recommended products
Developers
APIs by industry
Use case library
Related sites
New releases
Join a TR community
Free trials & demos
Thomson Reuters US Legal Bookstore
Top selling Publishers
Explore what's new & noteworthy
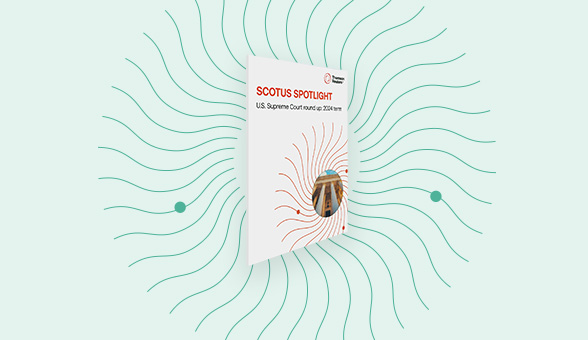
Westlaw Today SCOTUS Spotlight
Access timely, in-depth reporting on important Supreme Court cases from the 2024 term—eliminating the need to review lengthy opinions or consult multiple sources.
Bundle and Save with ProView and Print
Save 35% or more by bundling ProView and physical books. Unlock the maximum flexibility to research wherever work takes you. Bundle and save with ProView e-books and physical books. Find the answers you trust in the format that best suits your research needs.
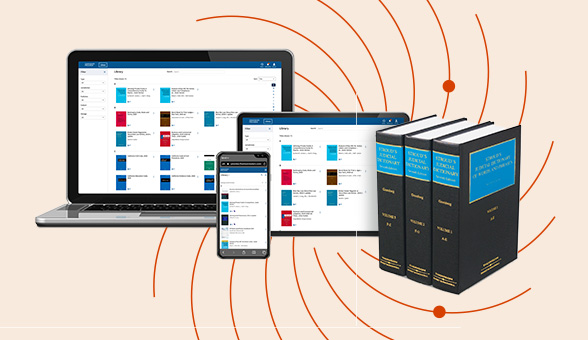
Check out our latest legal essentials on our ProView eBook reader.
Enjoy a consistent, book-like reading experience with ProView on any device: laptop, smartphone, tablet, or desktop. Perfect for legal professionals who need reliable access to trusted content anytime, anywhere.
Shop All O'Connor's Titles
O’Connor’s books offer concise editorial insights and practical commentary on the most essential Texas legal topics to help simplify your legal research.
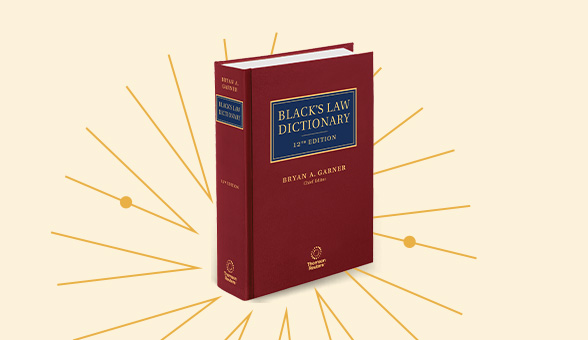
Black's Law Dictionary
The world's leading legal reference book, redefined.


Westlaw Today SCOTUS Spotlight
Access timely, in-depth reporting on important Supreme Court cases from the 2024 term—eliminating the need to review lengthy opinions or consult multiple sources.
Bundle and Save with ProView and Print
Save 35% or more by bundling ProView and physical books. Unlock the maximum flexibility to research wherever work takes you. Bundle and save with ProView e-books and physical books. Find the answers you trust in the format that best suits your research needs.
Check out our latest legal essentials on our ProView eBook reader.
Enjoy a consistent, book-like reading experience with ProView on any device: laptop, smartphone, tablet, or desktop. Perfect for legal professionals who need reliable access to trusted content anytime, anywhere.
Shop All O'Connor's Titles
O’Connor’s books offer concise editorial insights and practical commentary on the most essential Texas legal topics to help simplify your legal research.
Black's Law Dictionary
The world's leading legal reference book, redefined.
Shop by jurisdiction
Pinpoint the resources legal professionals need in your jurisdiction
National
Federal
California
New York
Texas
Florida
Bankruptcy law
Criminal law and procedure
Labor and employment law
Estate planning
Family law
Real estate law
Key resources

Customer support
Got questions or need help? Our customer service team is here to help. 1-888-728-7677
Contact support

Contact Sales
We can help you with your questions about Thomson Reuters Print titles.
Contact sales

Log in to Proview
Not your first e-book purchase? Log in to Proview and access your library.N
ProView resources